Stories of faith, hope and encouragement

Exposure Triangle: ISO

RTB Blog Post Featured Image Template (3)
In this 3-part series, we look at manual camera settings for correct image exposure.

The Exposure Triangle shows the connection between three essential camera controls:

  1. ISO = sensitivity of the camera sensor
  2. Aperture = volume of light, that is size of lens hole that light passes through measured in f-stops, and
  3. Shutter Speed = time (duration) the sensor is exposed to light, measured in fractions of a second.
Let's define terms

Inside the body of a digital SLR camera is a shiny, thumb-sized plate.  This plate or sensor has millions of tiny photosites called pixels which measure and record information about brightness and color of the light that is focused upon it through the camera lens.

ISO is a unit of measurement that describes the sensitivity of the pixels’ ability to read that light. Like turning the volume knob on a speaker, an ISO adjustment increases or decreases the reception of the camera’s light sensor.

ISO is measured according to a numeric scale that represents stops of light intensity.  The higher the number, the more sensitive the camera is to light and the easier it is to capture an image in low light.  Thus, we select low ISO for bright scenes; higher ISO for darker scenes.

Said another way, ISO100 needs a lot of bright light to capture a proper exposure, while ISO200 being 1-stop more sensitive needs only half the light to shoot a well exposed image – assuming the other two corners of the Exposure Triangle stay the same.

It’s a tricky balancing act because anytime you  change a setting in the Exposure Triangle – ISO, Aperture or Shutter Speed – you must balance your exposure with adjustments to the other two corners.

ISO units are doubled, so typical values are:

100->200->400->800->1600->3200->6400->12,800… you get the picture.

Close up of mirrorless sensor - 26,100,000 photosites (pixels)
Why not use High ISO to shoot everything?

If the other variables of Aperture and Shutter Speed can be adjusted, you may ask why not just set ISO very high – night vision style – and simply shrink Aperture or increase Shutter Speed to get a good exposure?

That is a fair question. 

The reason is that there is a trade off when using high ISO that impacts the quality of a final image.  And that trade off is NOISE.  

Noise occurs in a digital image when the camera sensor and processor must interpret whole blocks of pixels that are registering an inaccurate signal due to low light.  Like a childish paint-by-numbers project, the processor is forced to guess the intensity, color and hue that large areas of poorly lit pixels are seeing based on information from neighbouring pixels. Thus, the interpreted results become chunks of rough edged dots, blotched bands of discolouration and poor gradient transitions, appearing more like an irritating static.

Click on the images below to see results from an experiment in light done recently overlooking the Angus L. Macdonald bridge in Halifax, Nova Scotia.  I intentionally used the increasing light of dawn to reduce my ISO settings, while maintaining Aperture and Shutter Speed at the same settings.  The close up images really show the impact of digital noise at the pixel level.

Digital noise is different than film grain

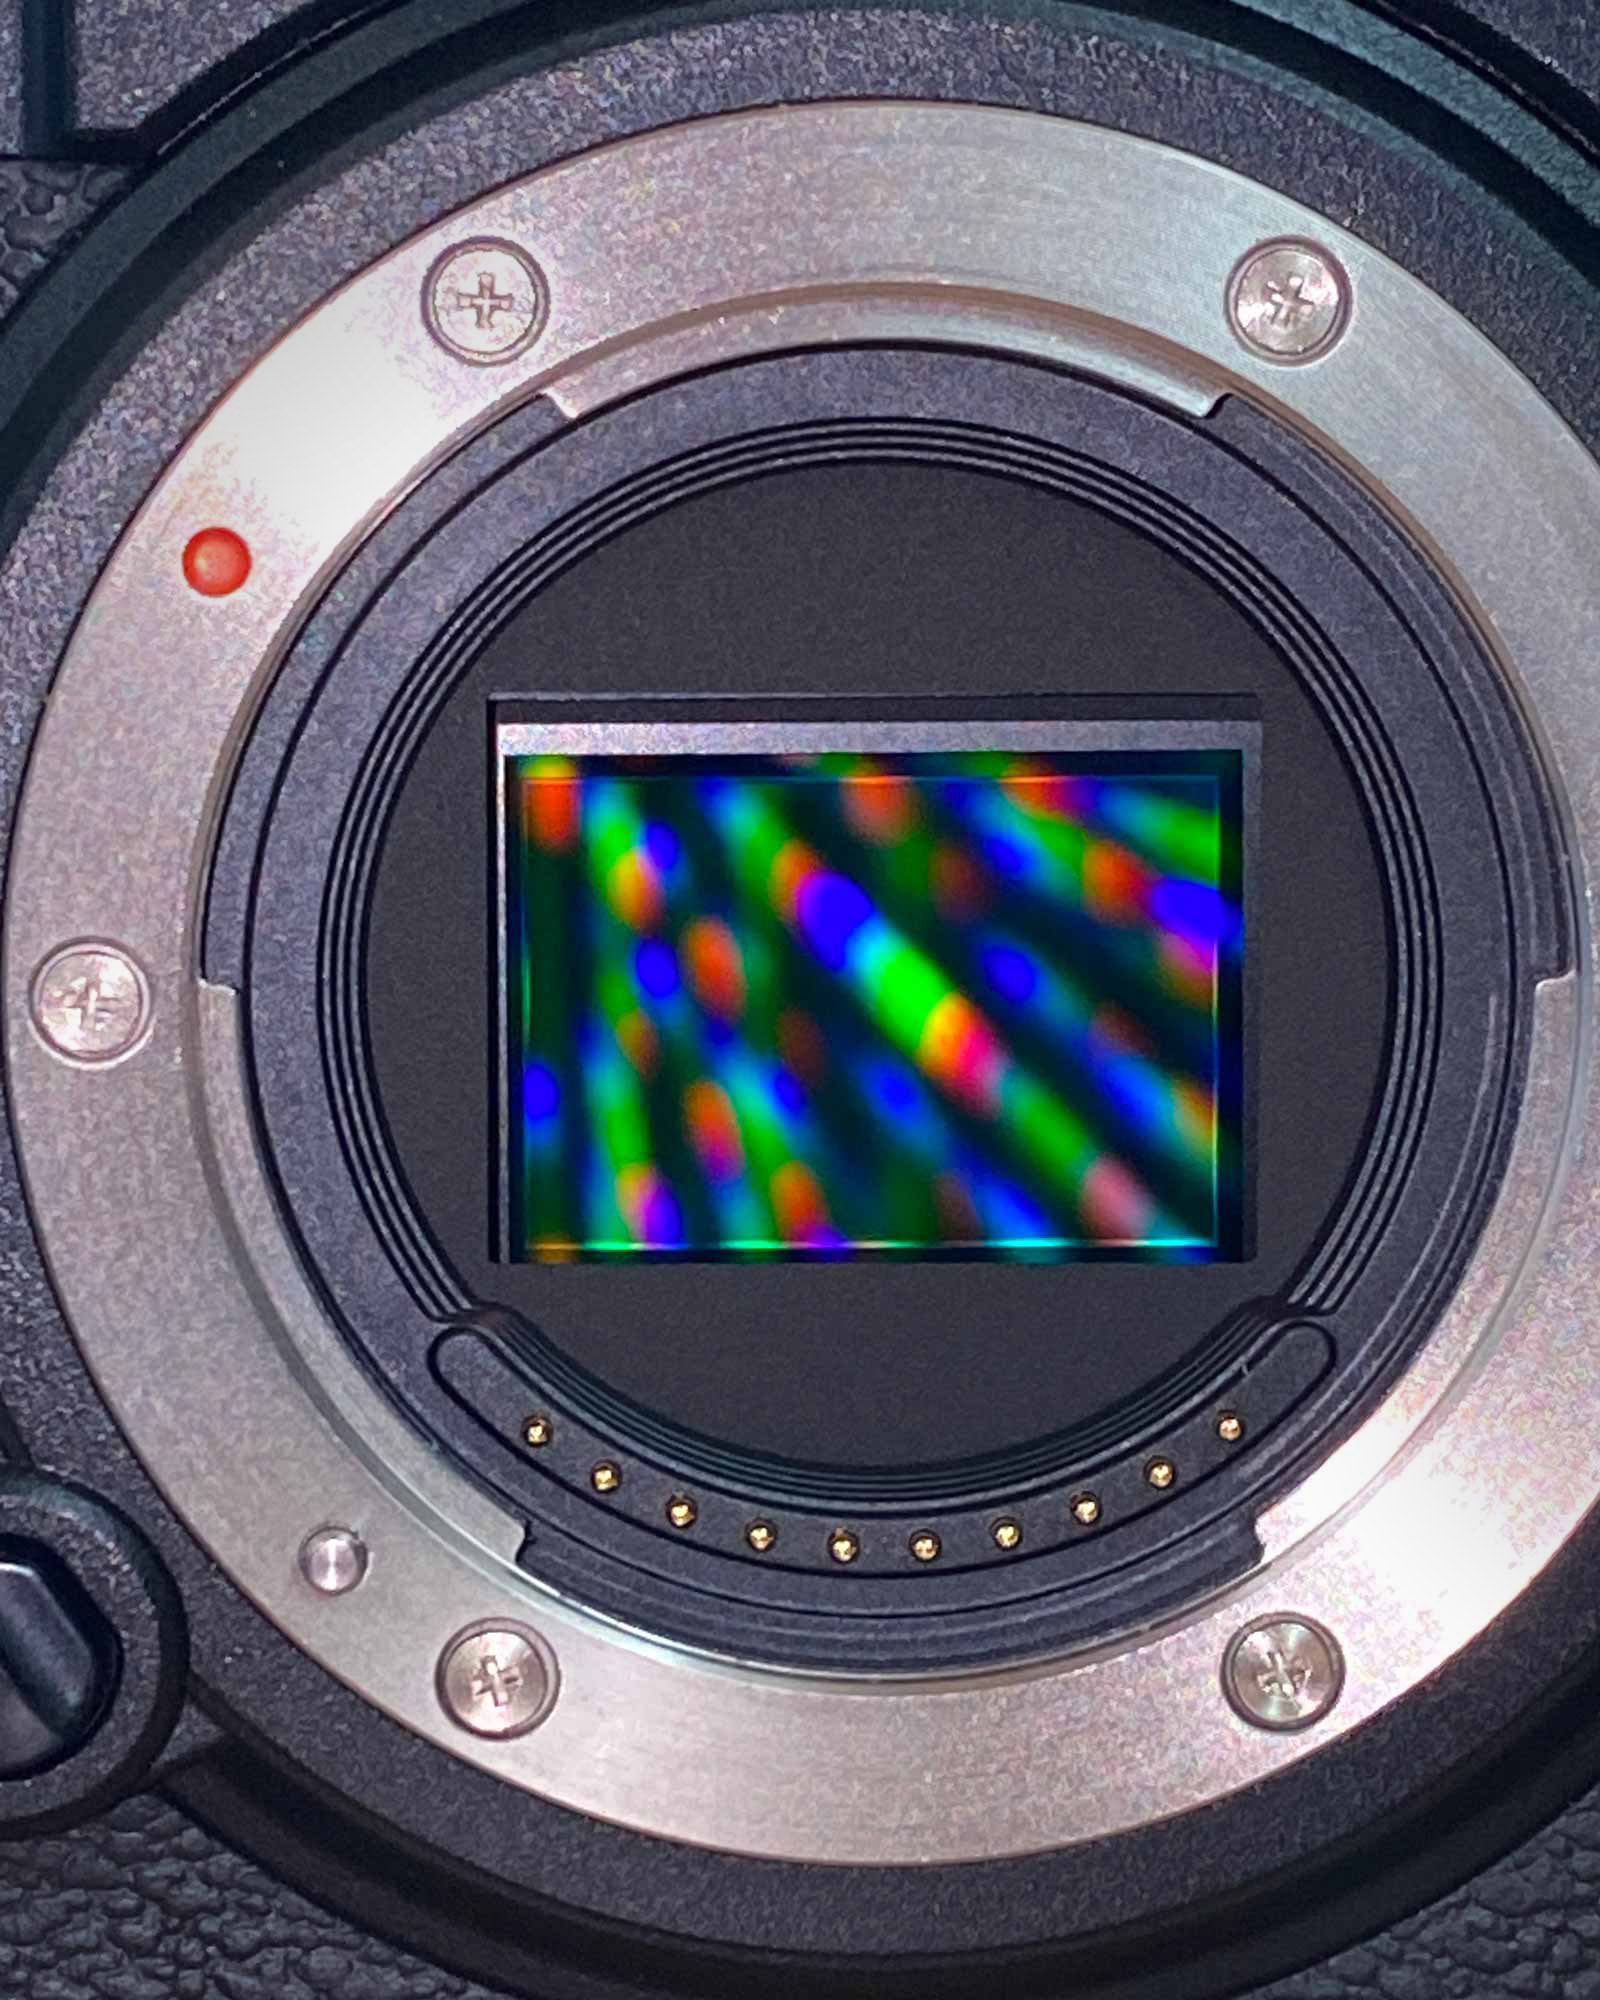
Of course, the vast majority of photo and videography is now shot digitally, but there are still die-hard creatives and purists out there who love the look and feel of film – and more power to them.  Film produces a unique look that digital images still struggle to replicate. One of the essential differences lies in the fact that film relies on a chemical process to capture light, rather than a computer generated set of pixel readings.

Jacek Halicki, Wikipedia

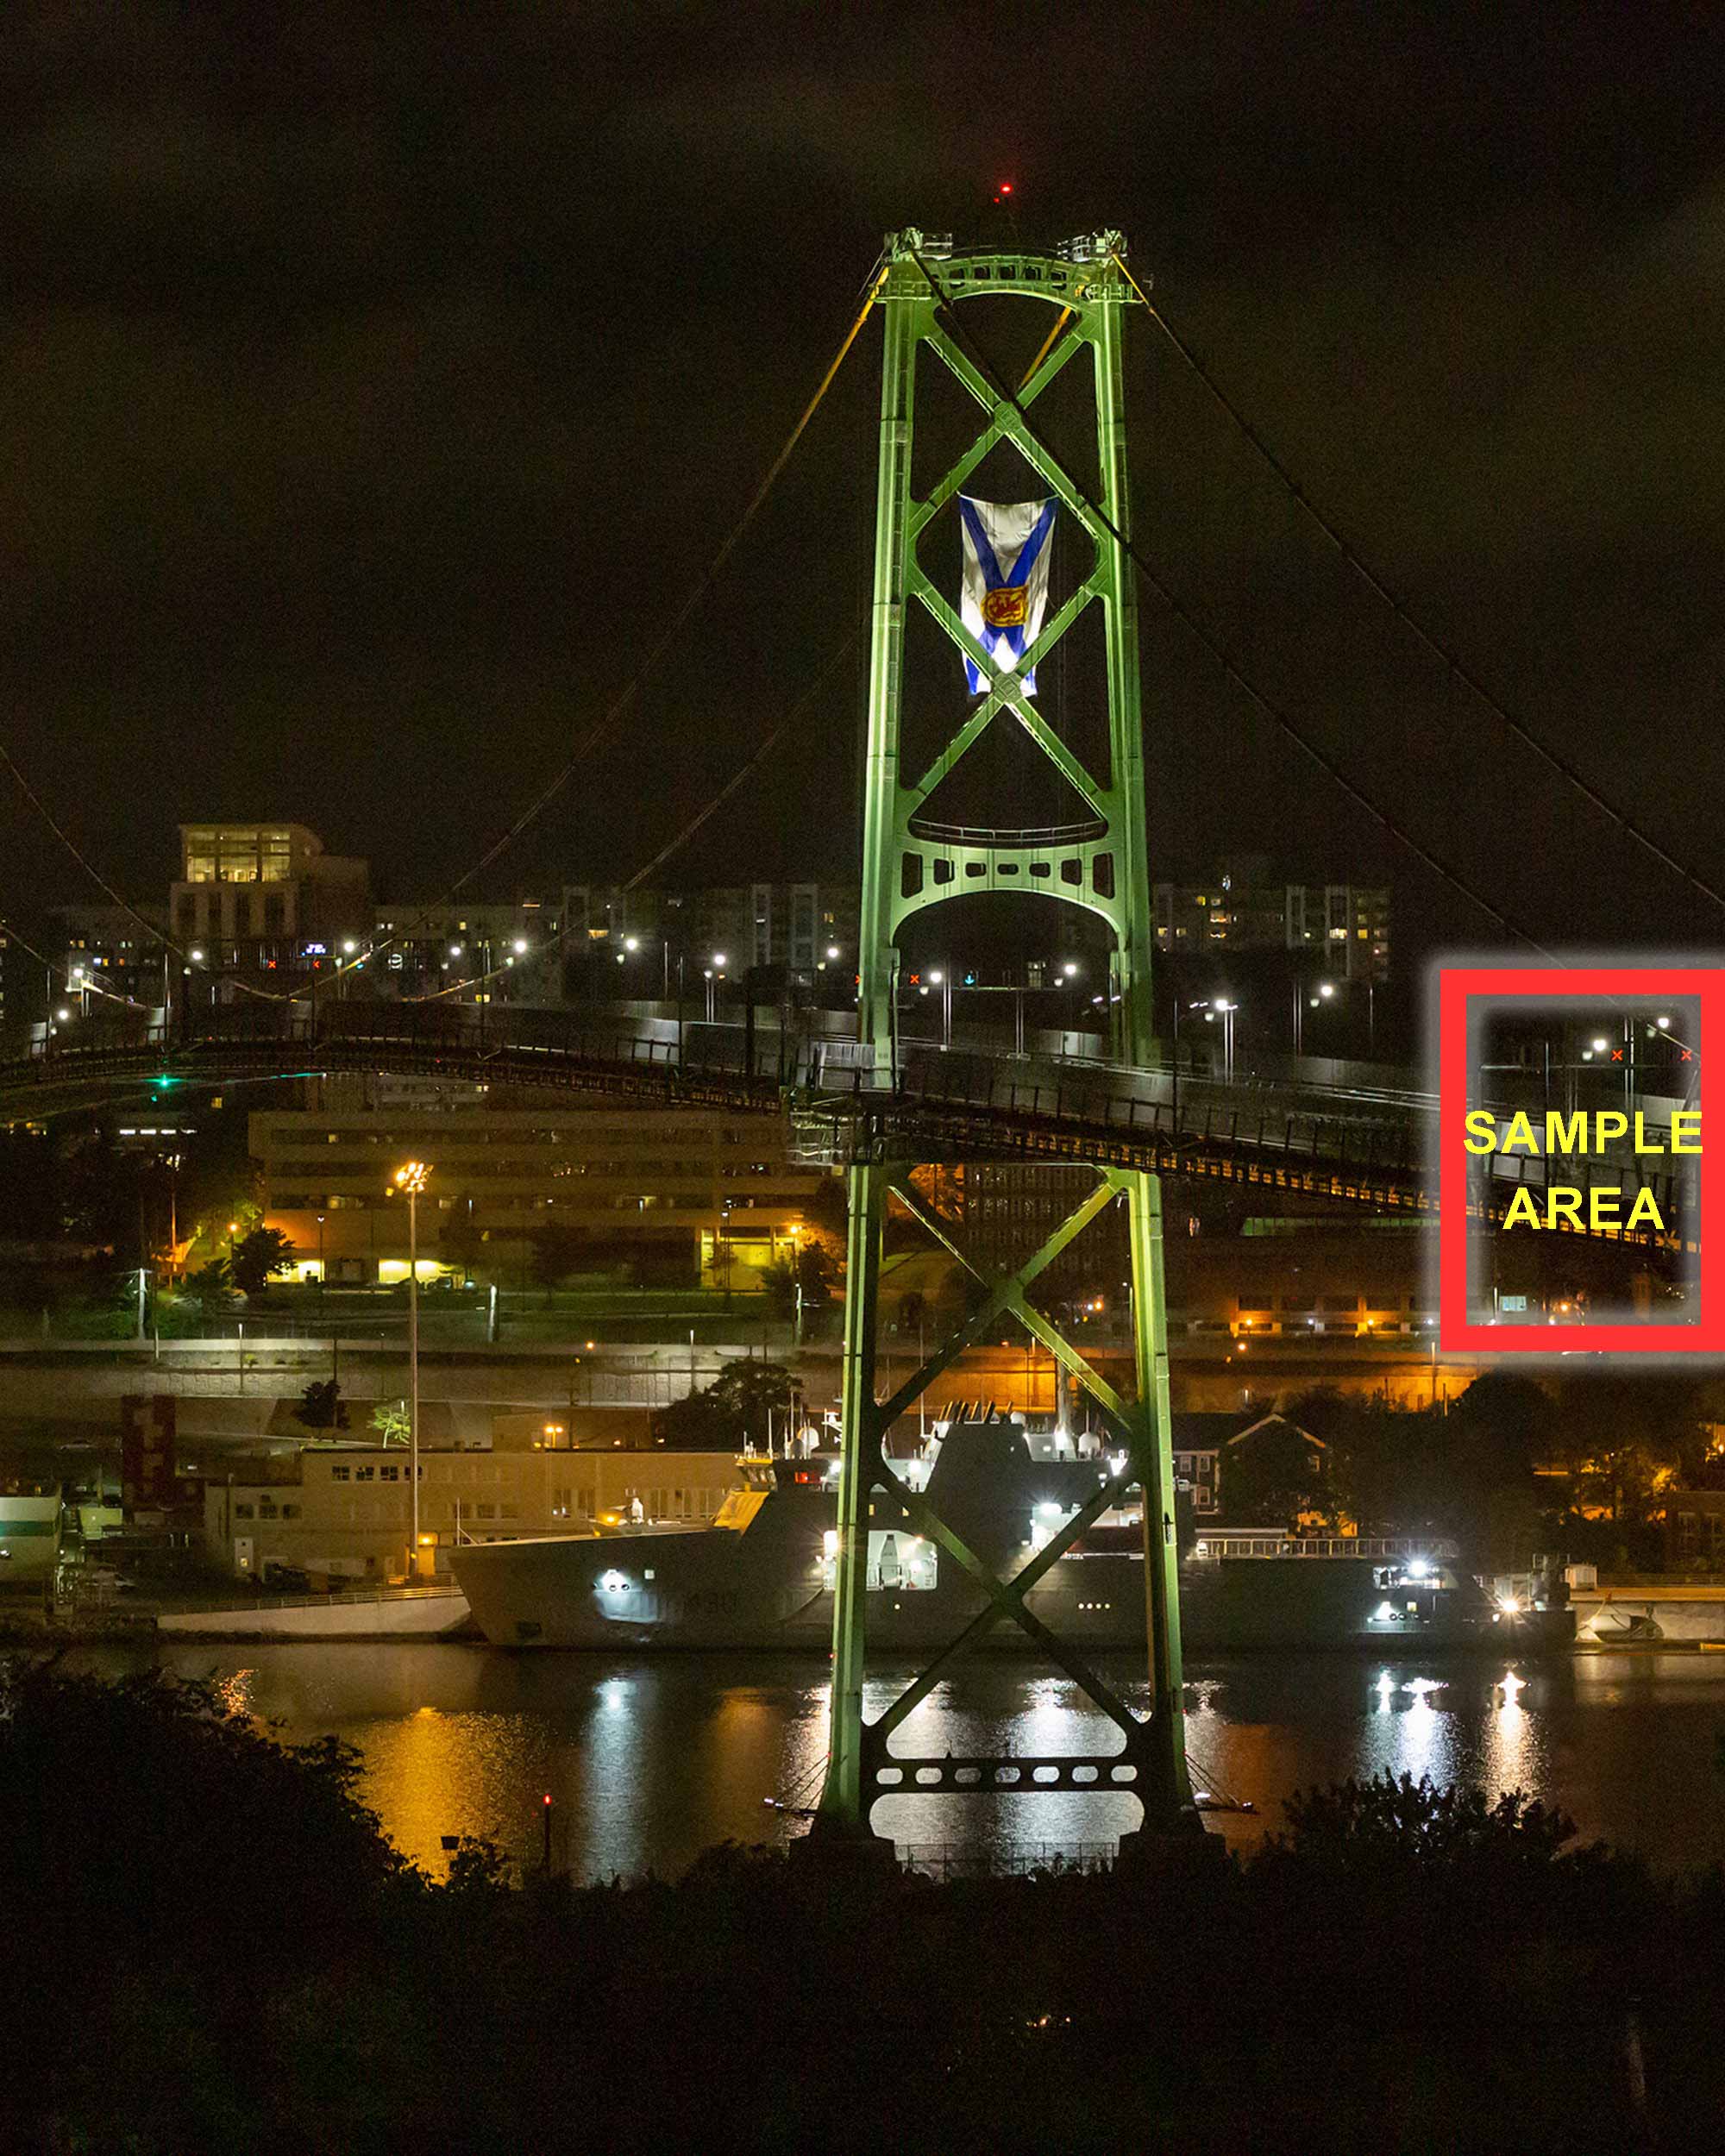
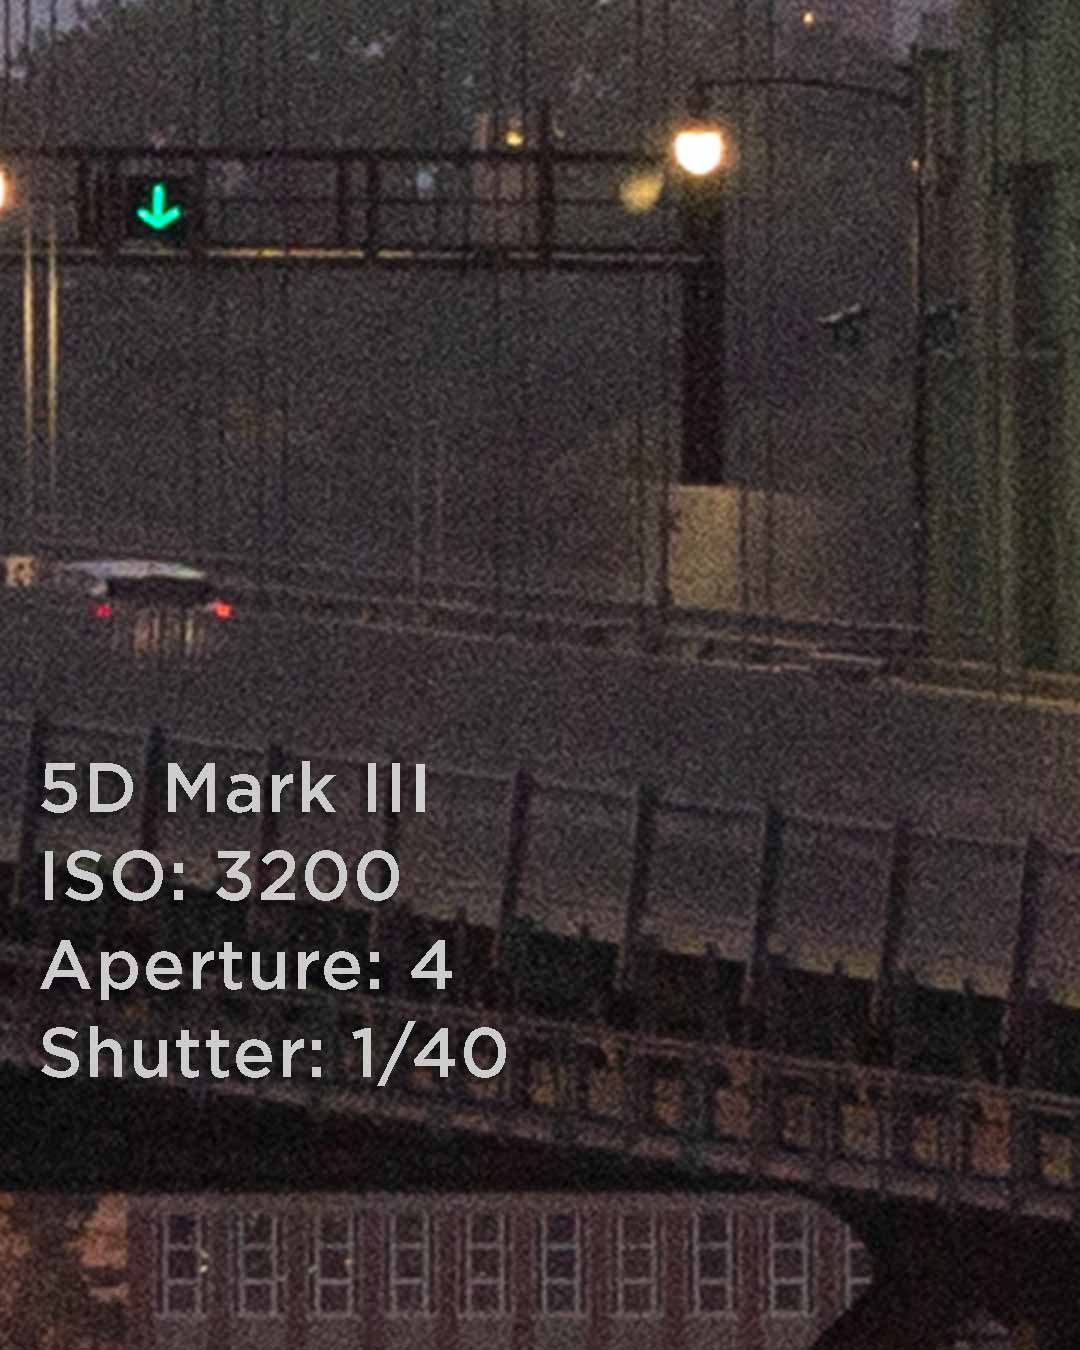
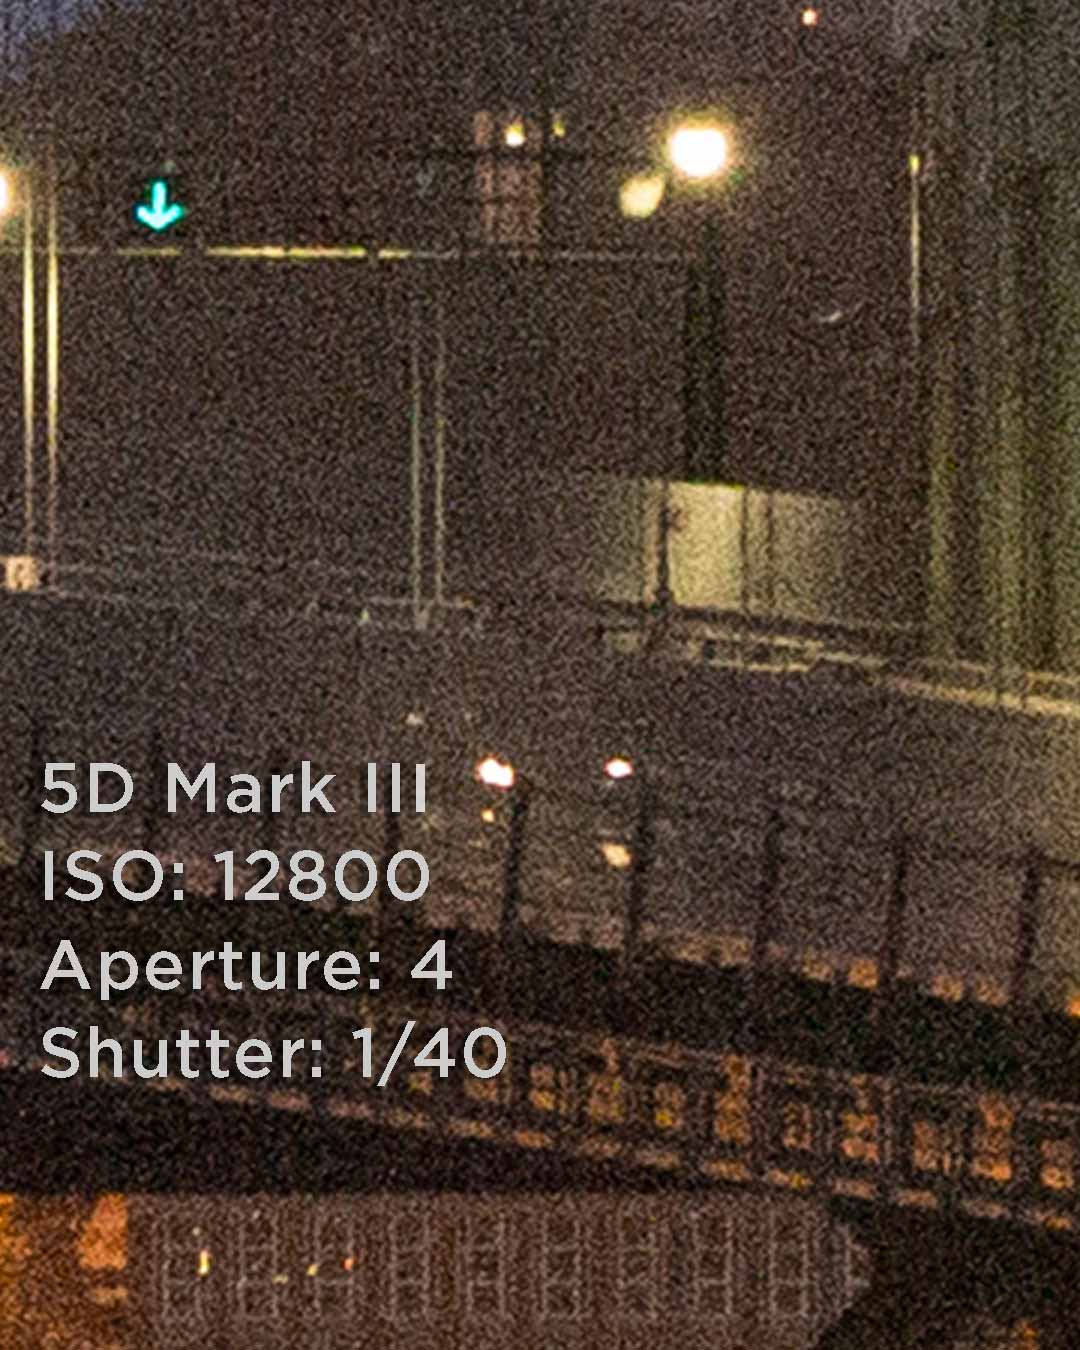
The difference between digital and film can be quite dramatic, when viewed on a granular level. Click the image here to see for yourself.

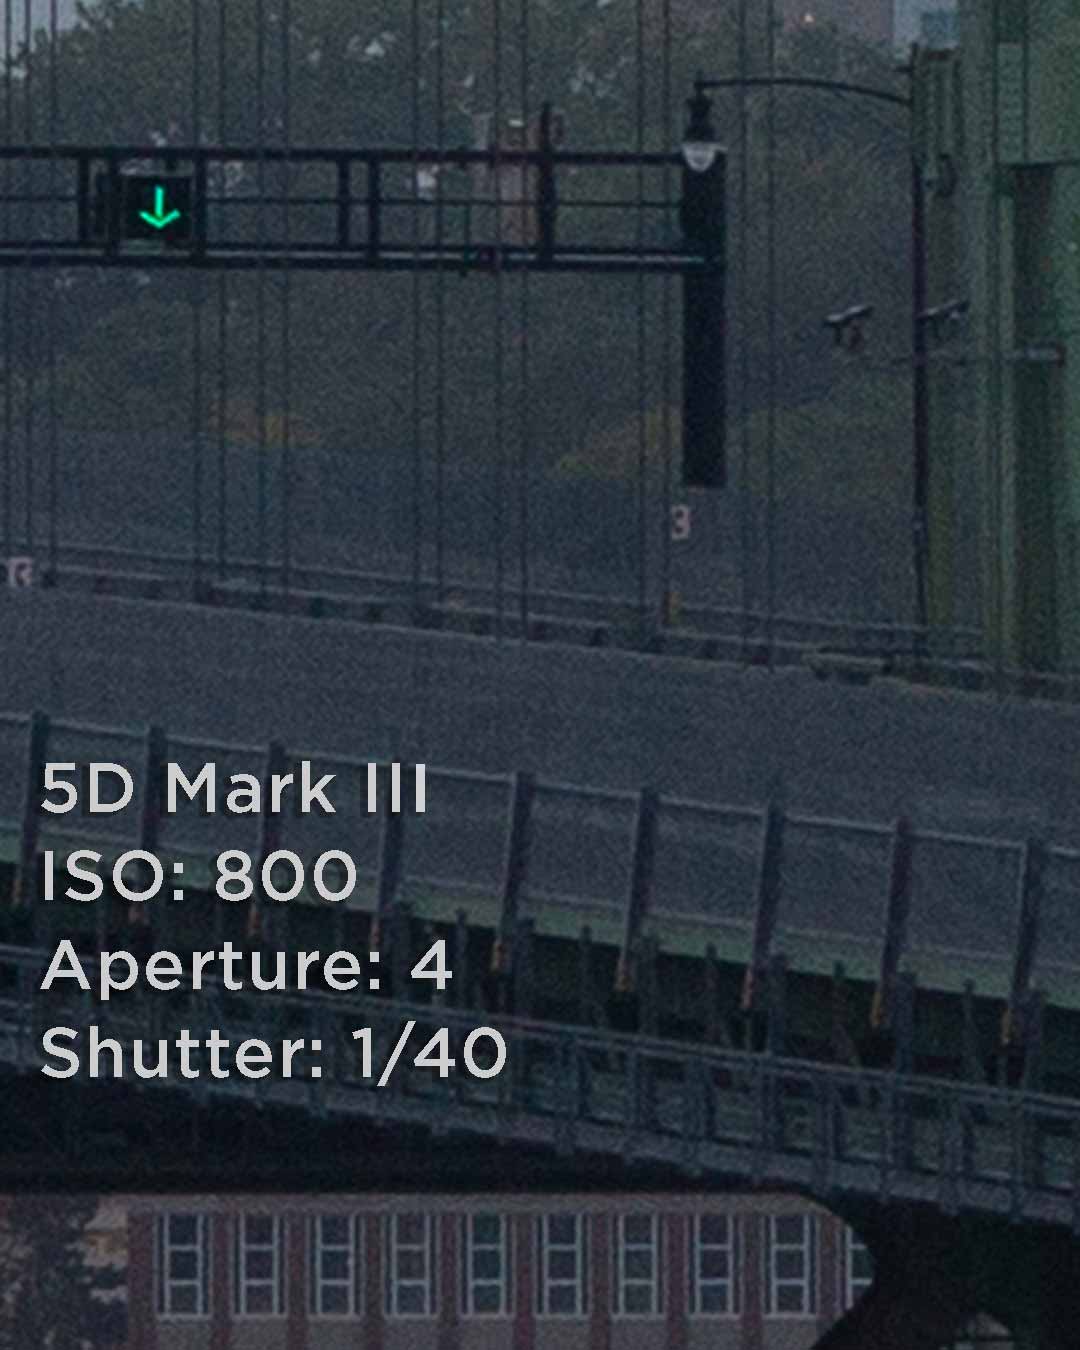
High ISO film produces a grainy looking image, which is often celebrated in an artistic sense and is considered acceptable, even desirable in certain situations – think historic black and whites, and today’s street and concert scenes.  

So yes, it can come down to an artistic decision, but generally speaking, a high ISO setting on digital cameras produces a frame that is smattered with digital noise that looks much like static. And from a commercial or editorial standpoint, that is something to be minimized as much as possible.

What's with the name ISO?

The letters I-S-O are actually an awkward acronym that stand for the International Organization for Standardization, a global body of scientists and policy makers whose goal is to bring consistency into the world through benchmarked measurement systems.  So, the name ISO seems to be one of those quirks of languages that was lost in translation.

Click vs. Kaching

Back in my days of shooting film, selecting ISO was a financial decision because you had to understand the lighting conditions and choose what ISO you would shoot for an entire roll well in advance of taking any shot. A roll of film would cost as much as $15, plus lab development fees and that added up quickly for high-coverage events, like a wedding.

There were tricks we developed where you could wind an unfinished roll back up into the canister and later fish out the end of the roll with a piece of stiff two-sided tape.  You would then load the film back into your camera and  carefully advance the film forward to the frame you had left off at.

Subscribe
Notify of
guest

0 Comments
Inline Feedbacks
View all comments

MORE LIKE THIS

Death by dongle

Death By Dongle

We’re in mid-packing for a longterm overseas assignment.  Naturally, we want to travel light and this is a perfect time

Read More »

Follow on Facebook